So you’re planning a trip to Cebu and want to see everything but don’t know how? Well you’ve come to the right place! I’ve crafted this Cebu itinerary to make sure you hit all the major tourist attractions in the most efficient way possible!
Before I visited Cebu, I dedicated a lot of time to researching the island. I wanted to know if there was a way I could arrange my trip and the places I was visiting in a way that maximizes time and minimizes cost. I always do this whenever I travel because even the order in which you hit certain attractions can affect your time and budget. I ended up with this Cebu itinerary, which I hope can help you as much as it helped me.
I know that time off from work to go on vacation is precious, so hopefully this Cebu itinerary can help you make the most out of your limited time on the island. All of this is based on my recent trip to Cebu so it’s a battle-tested strategy. But before we get to the nitty-gritty, I should probably clarify a few things first.
Click the following links to book popular Cebu Tours: Canyoneering Experience, Pescador Island Snorkeling, Cebu City Tour, and Whale Shark Swimming Tour!
Subscribe to my Youtube channel @ Stephen Flores Travel, like me on Facebook at Passport Perspective, and follow me on Instagram / Twitter / Tiktok @StephenJFlores.
This post contains affiliate links. We receive a small commission for purchases made after clicking on these links at no extra cost to you.
Introduction
This post contains two itineraries: one for if you base yourself in Cebu City, and the other for if you base yourself in Moalboal. I’ll be writing about them in separate sections so that you can see the advantages and disadvantages of each Cebu itinerary more clearly.
Also, at the end of the post, I will tally the expenses I incurred and give you a rough budget for each day of the Cebu itinerary and also for the trip as a whole.
Finally, this Cebu itinerary will also include things I missed out on, such as hiking Osmeña peak and the Whale Sharks experience, among others. I’ll try to explain as best as I can how to do these experiences even though I’ve never personally done them just to give you guys a fuller picture of what you can do when you visit Cebu.
So now, without further ado, here’s my complete 6-day Cebu Itinerary.
IF YOU: Base Yourself in Cebu City (Cebu Itinerary 1)
Day 1: Historic Cebu
You only need two days to explore Cebu City, and the first day is dedicated to an area that I unofficially call the “Historic District”. I’ll explain the order we used for these attractions but basically there are two possible routes to take: the south to north route and the north to south route. I did the south to north route given that I wanted to be near Colon street around lunch time and the northern area of the itinerary is closer to Colon street than the southern area is. But either way works!
This day is designated as the first day because of the short amount of time it takes to see everything, which means that if you fly to Cebu in the early morning, you’d still be able to complete this day. I flew in at night the day before my first day and paid Php 442 ($7.61) for a Grab from the airport to my hotel.
For this day, we ate breakfast at our hotel. If that isn’t an option, Cebu City has many places you could grab breakfast in before you head to all these places such as Birdseed Breakfast Club and Bicester Cafe, which both serve traditional breakfast food.
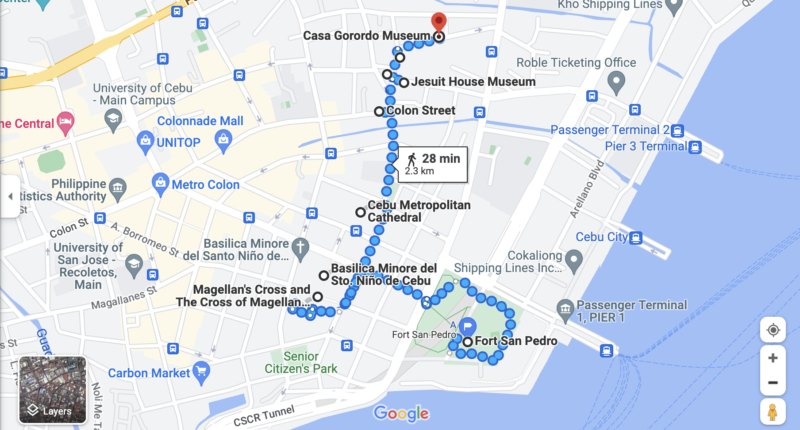
Another thing to note is, other than taking a Grab to our first destination and taking a Grab back to our hotel from our last destination, we just walked this entire route. Historic Cebu’s attractions are all close together, so it’s easy to go from one place to another.
So here’s the south to north itinerary! And just flip this entire section around if you want to do the north to south itinerary.
Here’s a map of the route for your reference:
Stop 1: Fort San Pedro
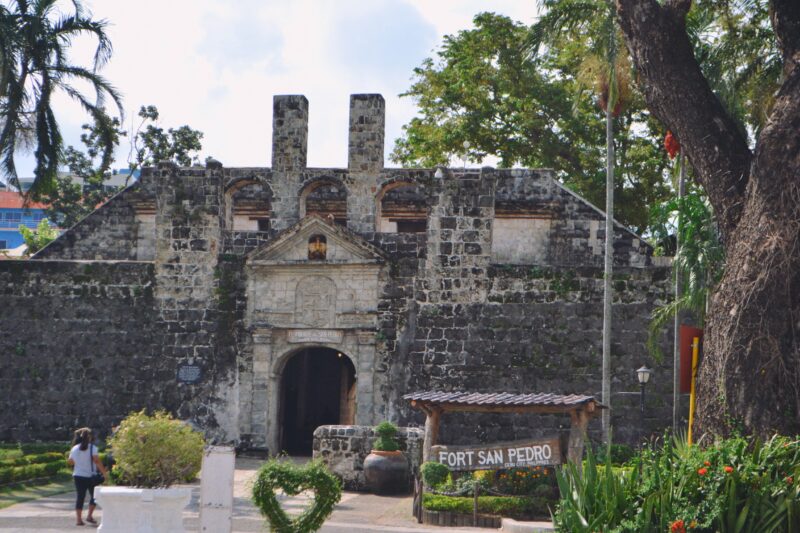
If you’re taking the Jeepney, make sure you get off at the fort and note that you may have to take more than one Jeepney to get there. Set your Grab’s destination for here as well if you’re using Grab. I took a Grab to get here and that cost Php 141 ($2.41). The fort is the oldest and smallest fort in the Philippines and shouldn’t take more than 20-25 minutes to tour completely, and that’s if you stop to take photos. It costs Php 30 ($0.51) to enter. I personally think it’s well worth the money, even if it takes such a short time to tour. It’s grey stone walls may not be the most eye-catching, but it definitely adds to it’s charm.
When you’re done going around, head northwest to reach the next destination.
Stop 2: Basilica del Santo Niño
Our second stop on the Cebu itinerary is completely free to enter and is a place you don’t want to skip. This basilica is believed to have been built on the site where Miguel Lopez de Legaspi’s expedition team found the image of the Santo Niño which is essentially a small statue of Jesus as a child. It was originally given to a local chieftain’s wife by Ferdinand Magellan. If you want to see the statue, head for the white courtyard to the left of the main church and follow the signs to the queue. Taking photographs is not allowed, but it is pretty amazing to think that the image is over 500 years old now.
The basilica is huge, with an outdoor mass service area and a large, ornate church with the aforementioned courtyard taking up both sides of the grounds. Be sure to check out the church, which has unique carvings on its ceiling and an impressive altar. It should take you around 30 minutes to slowly appreciate all the details of the Basilica and its courtyard plus see the Santo Niño. After going around, head for the exit to the left side of the basilica grounds if you’re facing the church to get to your next destination.
Stop 3: Magellan’s Cross
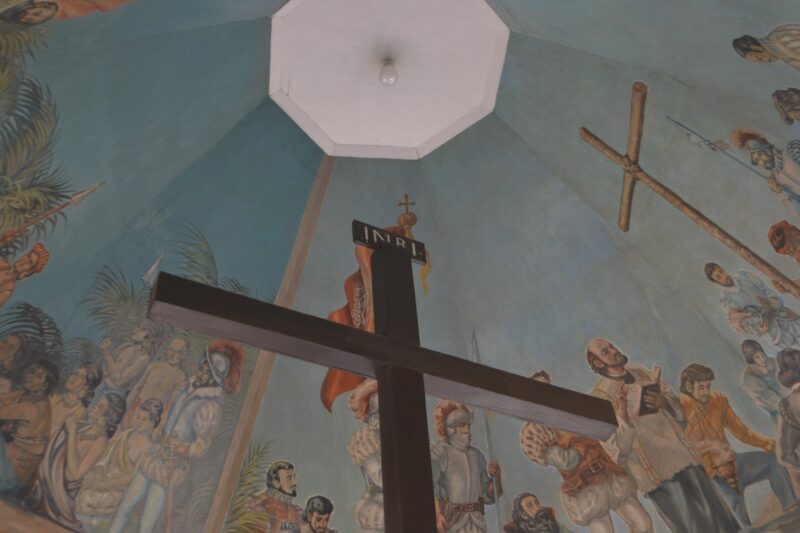
Magellan’s Cross is the other Catholic artifact that Magellan brought to the Philippines. He erected it the day he arrived on the island as a way of symbolizing the arrival of Christianity in the region. The site where the cross sits today is believed to be the site where he originally planted it. The pagoda-like structure is small and there is no charge to enter. Fun fact: the real cross is actually INSIDE the brown, wooden cross you see at the pagoda. It had to be encased for its own protection because some people started to chip away at it because they thought it was miraculous. Visiting this place will only take around 5-10 minutes of your time.
Head north past the Basilica to reach the next stop on the tour.
Stop 4: Metropolitan Cathedral
You won’t miss the striking white facade of this great example of Spanish-colonial architecture. This church was actually destroyed by bombings in World War 2 and rebuilt into what it is today. While not as intricate and eye-catching as the Basilica, it’s still a beautiful church and worth a stop if you have extra time or if churches are your thing. If not, then it’s fine to skip it. It shouldn’t take you more than 10 minutes to see everything.
Now you’re gonna go northwest again to get to the next tourist attraction.
Stop 5: Colon Street
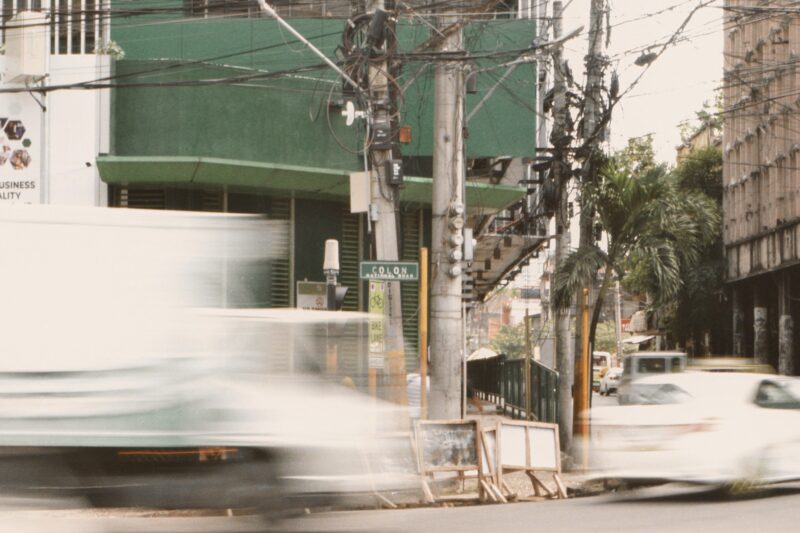
Heading northwest from the Metropolitan Cathedral, you’ll reach one end of Colon street. Colon street is the oldest and shortest national road in the Philippines. It’s also one of the only places in Historic Cebu with actual walkable sidewalks. It’s not remarkable by any sense of the word, but the restaurants and shops that dot the road are pretty good and give you a good slice of what local life in the city is like. I actually came back to try one particular restaurant: Dimsum Break, which I would highly recommend if you want good Chinese food. Length of time to tour this place depends on how far you walk and if you decide to eat/shop here.
From here head north to reach the Parian district, which is the location of four historical attractions.
Stop 6: 1730 Jesuit House Museum
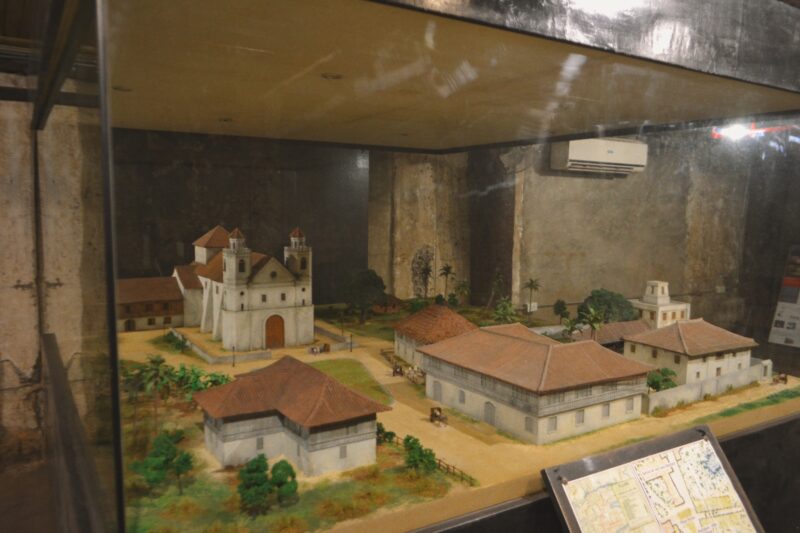
When you arrive at the location of this stop, you might wonder if you’re in the right place. The Google Maps location brings you to a welding warehouse. When I went here, I was confused until a security guard pointed out that the house was INSIDE the warehouse. It was a peculiar sight, and things only got more interesting from there. It cost Php 50 ($0.85) for students and Php 100 ($1.70) for the general public to enter and you will be assigned a guide who will take you throughout the house. This is probably my favorite stop on this leg of the Cebu itinerary.
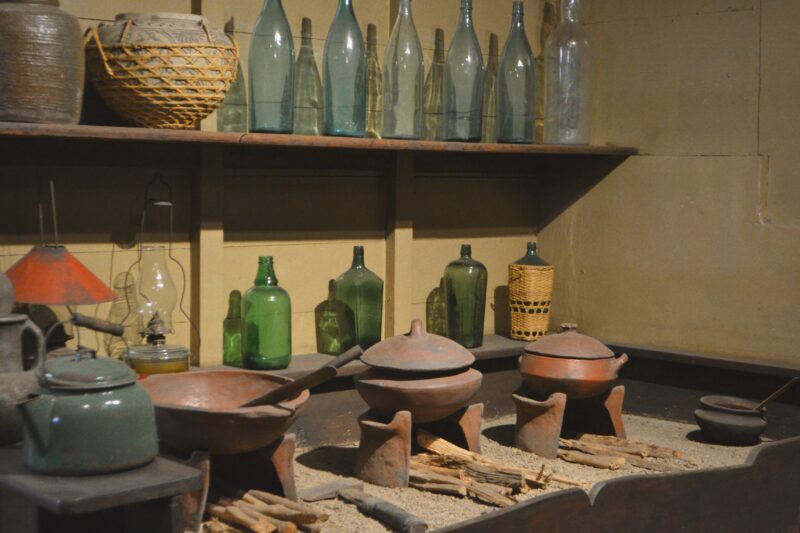
The ground floor of the house is a museum dedicated to Cebu’s role in shaping Philippine history. The second floor is a display of what the house might have looked like all those centuries ago, complete with old furniture and other artifacts. I wish we had more time to soak everything in but our guide was leading us pretty quickly through the exhibits. I could have easily spent an hour to an hour and a half here just reading all the information and admiring all the exhibits.
The next stop is right outside the 1730 Jesuit House Museum and it’s pretty hard to miss.
Stop 7: Heritage of Cebu Monument
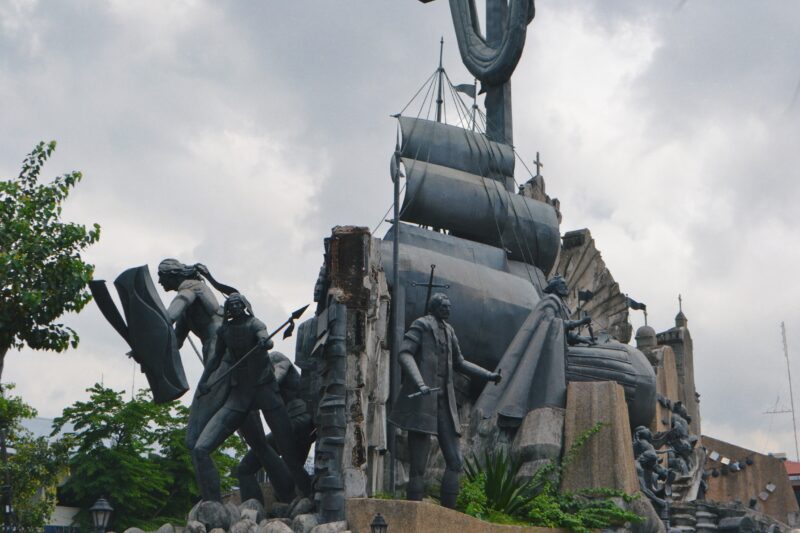
Similar to the Jesuit House Museum, this monument is a testament to the role Cebu played in Philippine history. It’s a very large sculpture that sits in the middle of the road. Believe me, you won’t miss it. Spend a minute or two admiring it then move on.
Stop 8: Yap-Sandiego House
This house is just one block north of the Jesuit House Museum. On first glance, the house kind of looks like it could topple over at any second, but inside you’ll find a fantastic collection of antique furniture and silverware. While it is a lot smaller than the Jesuit house, meaning it should only take you around 15 minutes to tour, it is well worth the Php 50 ($0.85) to enter. Visit the bedroom, the one thing lacking from the Jesuit House, to see how Filipino sleeping quarters looked like in the 1800s. They also have a small garden that you can take photos in. While I did not have a tour guide show me around the house, other people did, which makes me think that maybe they just overlooked me or forgot to assign me one.
A little ways up the street and to the right is the final stop on our Historic Cebu City tour.
Stop 9: Casa Gorordo
The last stop on our tour is Casa Gorordo. I was not able to tour this place as it was closed for refurbishment but I do remember some of it. It’s a beautiful building with rooms that showcase what local life was like for Cebuanos hundreds of years ago. It costs Php 75 ($1.28) to enter and takes about an hour to go around (if you really appreciate everything). There is a store and cafe on site as well.
Post-Itinerary Things
After admiring Casa Gorordo from the outside, I hightailed it back to Colon Street to buy some food I was gonna need for the next few days and to try Dimsum Break. I spent Php 245 ($4.22) in the grocery store and my lunch cost Php 85 ($1.46). My Grab from Dimsum Break back to my hotel cost Php 139 ($2.37). That night, I took a Grab worth Php 80 ($1.38) to Sunburst Chicken where I spent Php 114 ($1.95). I then went home on another Php 80 ($1.38) Grab and so ended my first day in Cebu.
Day 2: Cebu Island Hopping/Snorkeling Experience
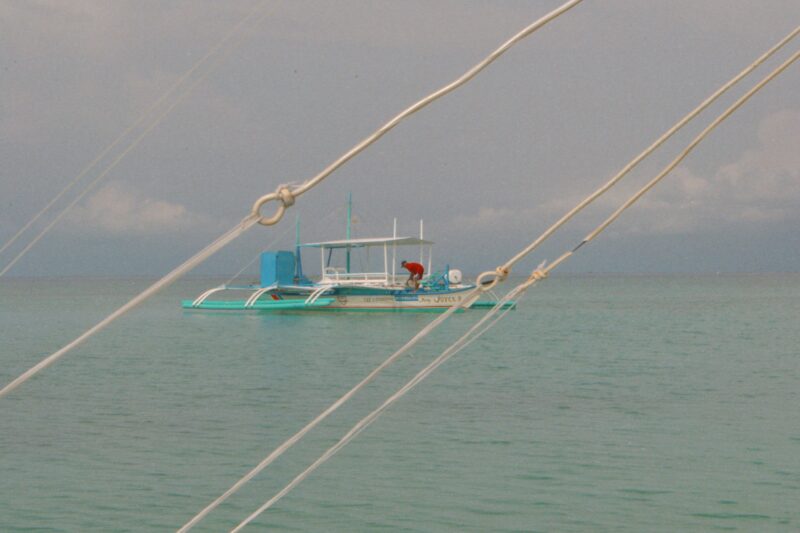
For Day 2, I recommend taking a break from Cebu City and its sights (we’ll go back to exploring Cebu city on the last day. If you’re wondering why, I’ll tell you more about it once we get there). As you’re gonna finish touring Historic Cebu in about 5 hours, that gives you plenty of time to rest and get some sleep to prepare for the next day’s activities.
Now take note this day can be interchanged with any one of the south of Cebu experiences, I’m just following my itinerary and put this first. Tours from Cebu City will usually pick you up early in the morning, drive you all the way to the south to do the experience, and then drive you back to your hotel. If you’re not a fan of road trips, this is one advantage of staying in Moalboal. You get to keep your back-and-forths to a minimum.
Also, it is possible to combine these excursions (most tours of this nature will combine the canyoneering with either the snorkeling or whale shark experiences) but I wouldn’t recommend it as it means you would have to rush through each experience instead of taking it all in. That and you would just tire yourself out by doing two. If you are interested in doing two, however, you can check out tours here. It cost $139.05 to do it alone, which is why I recommend doing it if you have at least two people in your group.
Travel to Moalboal
Your journey will begin in the wee hours of the morning as you pack your things and prepare for the 2 1/2 hour drive ahead. Your driver will pick you up in the morning at around 5am. We stopped at a place called Sula’s for breakfast that cost Php 120 ($2.07) and then headed to Moalboal, the city where the island hopping begins. I had to register outside by writing my information down on a sheet of paper and then headed inside to pay a Php 100 ($1.72) tourism fee. I was then briefed on the rules we had to follow while on the tour and then I was led to my boat.
Stop 1: Pescador Island
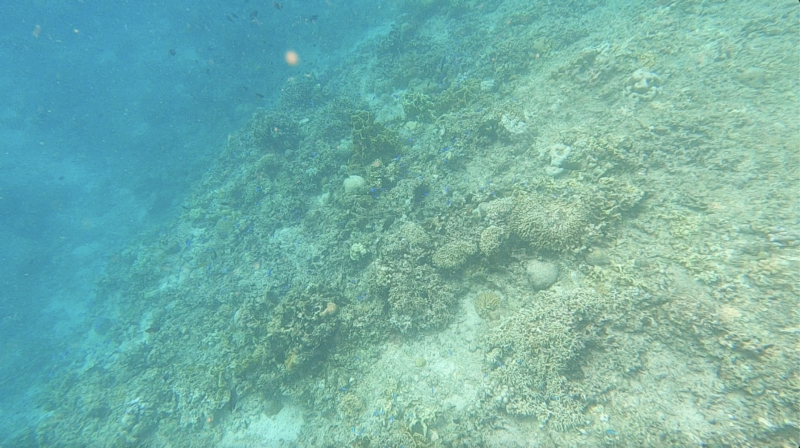
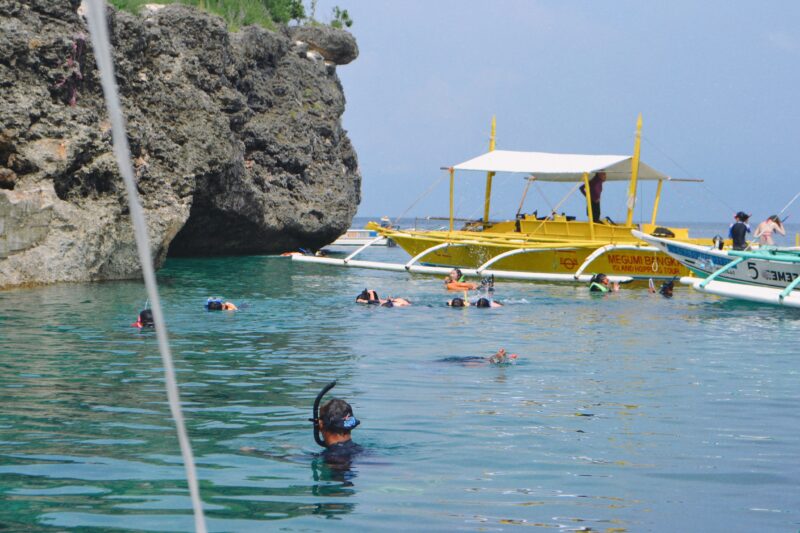
The first stop of the tour is Pescador Island. Here you’ll get to swim above a bunch of colorful corals filled with a TON of different kinds of fish. The corals here were actually brought in from other places because the original corals were devastated by a typhoon. You wouldn’t be able to tell, however, and it was a spectacular sight seeing all the fish swimming just a few feet away from you. This was not my first time snorkeling but, I have to say, this spot is now one of my favorites.
Stop 2: Sea Turtles
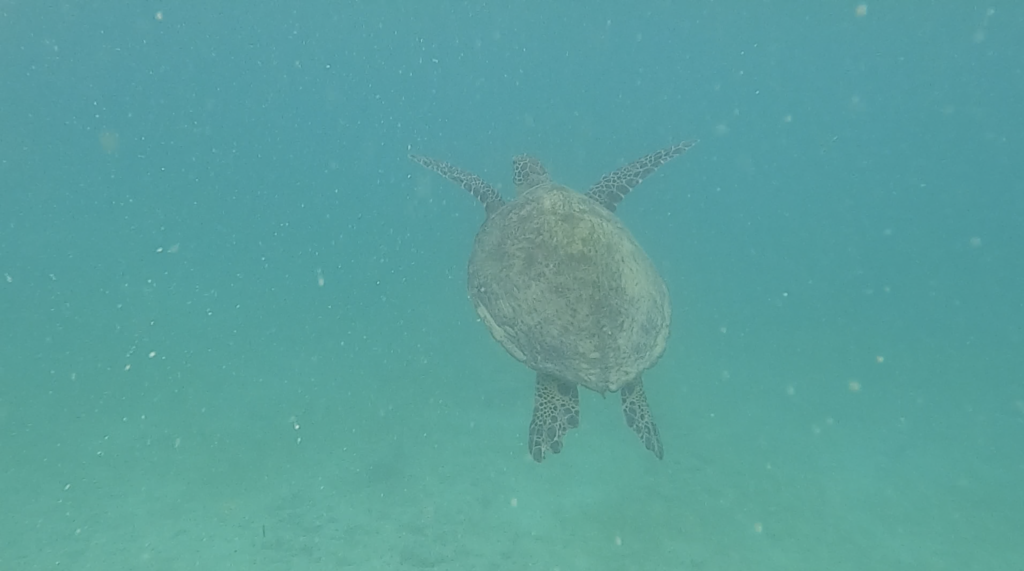
The second stop is, for me, the highlight of the day: swimming with sea turtles! When I was there, there were four sea turtles swimming about, which was really cool to see especially because we were just a few feet away from them. The only downside was that there were probably 50 other tourists all crowding around the same four turtles. That didn’t take away from the experience, however, as it was so cool seeing these turtles in action. Now take note: they’re not always guaranteed to appear and sometimes there are no turtles in the area so it’s really down to luck. But I’ve also heard that sometimes up to 8 sea turtles can appear at once. But believe me, seeing even just one is enough to leave you mesmerized.
Stop 3: Sardine Run
The final stop on this island hopping experience will take you to the middle of the sea. Here is where you can experience the famed sardine run. Supposedly, the sardines will be swimming all around you in a whirlpool-like manner. However, when I was there, we could only swim above them for safety purposes because the currents were strong. This dampened the experience as I didn’t get the full effect of these fish swimming around me. But it was still cool to see them all swimming underneath you and shimmering in the sun.
Post-Adventure Experience
After the excursion I tipped the captain and the second-in-command of my boat Php 250 ($4.30) each. Then I started the long journey back home, stopping at a Jollibee where I bought food for me and my driver which was worth Php 165 ($2.84). I tipped my driver Php 250 ($4.30) after he dropped me off at my hotel and then got ready to head to dinner. For dinner, I spent Php 200 ($3.44) on a taxi and a Grab going to and from the House of Lechon restaurant. I then spent Php 315 ($5.42) on food at the restaurant and concluded the second day of my trip.
Day 3: Canyoneering
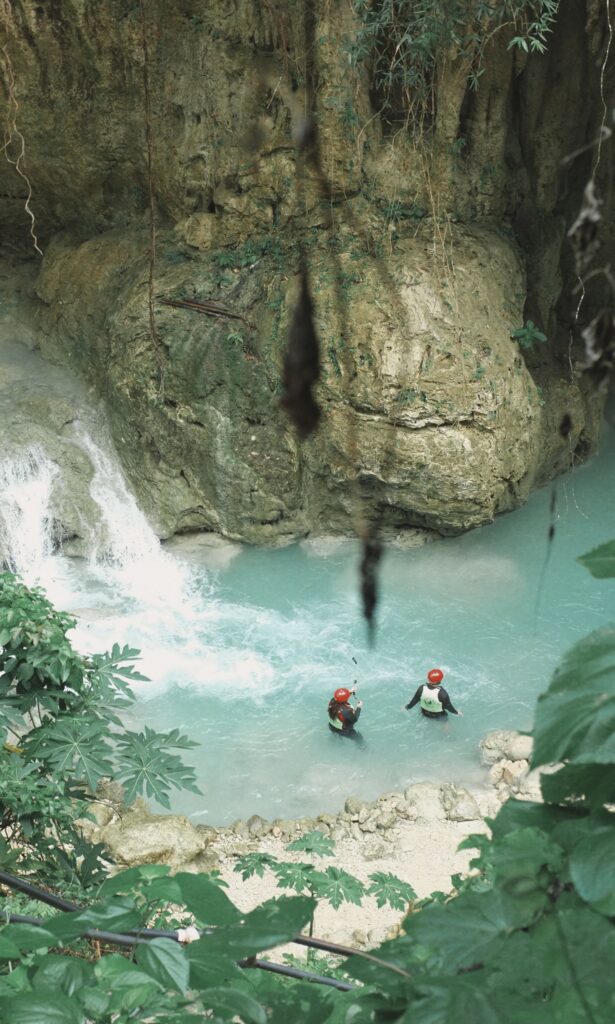
For your third day, get ready for another long trip down south as it’s time for what I think will be the highlight of your trip: Canyoneering! Now because you will be waking up early again, I recommend eating dinner and going to bed early. You can find the tour I used for this excursion here. It cost $73.85 to do the tour and your group must have a minimum of 2 people to do it.
Travel to Badian
We didn’t stop for breakfast so I ate some of the food I bought at the grocery store when I did the Historic Cebu City tour. I arrived at the base of the tour provider, was given a life jacket and a helmet, and met my guide. I brought my own aqua shoes so I didn’t need to borrow a pair from them but if you do forget to bring your own, they have some on hand. You WILL be told to wear them as the current of the river will sweep your flip flops away. I was told I could only bring my GoPro, my glasses, and some cash (for the food stalls that appear halfway through the excursion) as other things could get lost or wet during the experience. I then boarded my van and was taken to the start of the trail.
Canyonnering and Kawasan Falls
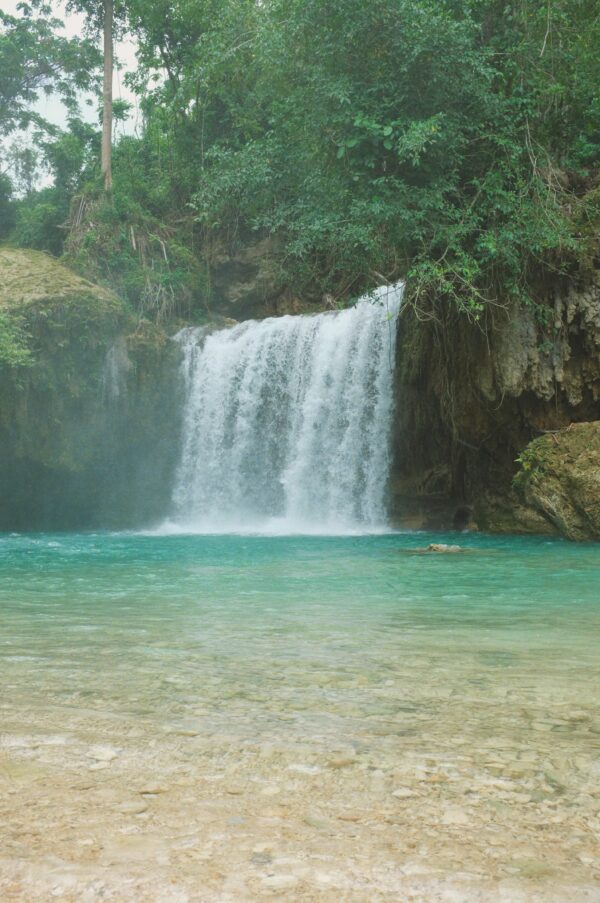
Once you arrive at the starting point, you are given two options: either walk 40 minutes to the beginning of the actual experience or take a zipline that would take you there in a minute. The zipline was expensive so I decided to just walk. It actually only took about 20-25 minutes to get to the starting point.
Then the canyoneering began. It’s really one of the best things I’ve ever done. Being in this canyon with walls that seemed to be 20 stories tall was amazing. I saw numerous waterfalls and jumped off multiple small cliffs as I made my way down the river. It was just such a cool experience. I would say though, if you have a fear of heights or falling, it may be best to skip this. You will be jumping and swinging from tall heights so it might not be for everyone. But if you’re even remotely adventurous and like to get your blood pumping, then put this at the top of your Cebu to do list.
Halfway through the excursion, there are stalls that serve food and drinks to energize you for the second half of the trip. It’s during this second half that you see many huge, gorgeous waterfalls that culminate in the most striking of them all: Kawasan Falls. Sadly, a lot of the infrastructure and foliage around the falls was destroyed by the same typhoon that destroyed the corals at Pescador Island. It was still a mesmerizing sight, however, and right now you can only see Kawasan Falls if you do this experience so its well worth it. It took about 4 to 5 hours to do the whole thing and, at the end of the tour, they served us lunch for free. I then paid my tour guide Php 300 ($5.16) then back into the car I went.
Post-Adventure Experience
Upon arriving back back at my hotel I paid my driver Php 250 ($4.30). For dinner I decided to go to Sugbo Mercado so I took a Grab from my hotel that cost Php 157 ($2.70) and bought food worth Php 90 ($1.55). And thus ended my third day in Cebu (I didn’t take a Grab back to my hotel as I took one to the airport to pick up my rental car. More about that in Day 6).
Day 4: Whale Shark Swimming
Now we’re getting to the part of the itinerary that I was NOT able to do. This excursion will take another day and goes more south than days 2 and 3. As a reminder, you can interchange these days to your choosing, but I’m sticking to this order for this itinerary.
For this excursion, you can book a tour here.
I was originally supposed to do this during my trip, but I didn’t because I personally found the process by which they get the whale sharks to swim near tourists to be unethical. I suggest you do your own research and figure out if you want to do this experience.
If you do decide to do this experience, you will be shelling out $89.68 to do it, inclusive of snorkeling and swimming fees but not inclusive of transportation (you will have to pay for fuel which, on average, will cost you Php1,650 ($28.4)). You will again be leaving at 5am and coming back at around 3pm. You have the option of going to Tumalog falls as well, which will cost you extra. Here are all the expenses associated with the experience, including estimates for food and tips based on the previous parts of this itinerary:
- Breakfast: Bought on first day
- Tips (Driver and Boatman): Php 500 ($8.61)
- Lunch: Php 75 ($1.29)
- Tumalog Falls Entrance Fee: Php 120 ($2.07)
- Grab to and From Dinner: Php 280 ($4.82)
- Dinner: Php 150 ($2.58)
Day 5: Osmeña Peak, Simala Shrine
For this part of the itinerary, you may want to consider renting a car. There are currently tours that will take you to one or the other but not to both. Renting a car for an extra day (cause I recommend renting a car on your last day as well, described below) will cost Php 2612.63 ($44.96). You could also rent a motorbike for Php 500 ($8.61), but the incline going up to Osmeña Peak, coupled with some bad roads, might be challenging for less experienced (or even some experienced) drivers.
Stop 1: Osmeña Peak
Upon arriving art the start of the trail, you will need to pay Php 30 ($0.52) at the tourism center. You will also need to pay for a guide, which could cost between Php 150 ($2.58) to Php 250 ($4.30). At this point I don’t know if a guide is needed, but you could easily follow the trail without one as it’s short, at around 20-25 minutes, and well marked. You’re then rewarded with stunning views of jagged mountains cascading down to the ocean. I put this as the first stop as people like to do this one to catch the sunrise so if that’s your kind of thing, you should definitely consider doing it then!
Stop 2: Simala Church
This castle-like church is about 90 minutes north of Osmeña peak. There is no entry fee and is totally worth going to if you’re already in the area or are on the way back to Cebu City. The twisting spires of this multi-tiered church will definitely leave an impression. Please note that there is a dress code for visiting the church. You will not be allowed in if you are wearing any clothing that could be considered revealing, including shorts and short skirts. If you’re coming from Osmeña peak, bring a change of clothes.
Post-Adventure Experience
Here are all the expenses associated with these experiences, including estimates for food and tips based on the previous parts of this itinerary:
- Breakfast: Bought on first day
- Lunch: Php 75 ($1.29)
- Grab to and From Dinner: Php 280 ($4.82)
- Dinner: Php 150 ($2.58)
Day 6: Cebu Outskirts
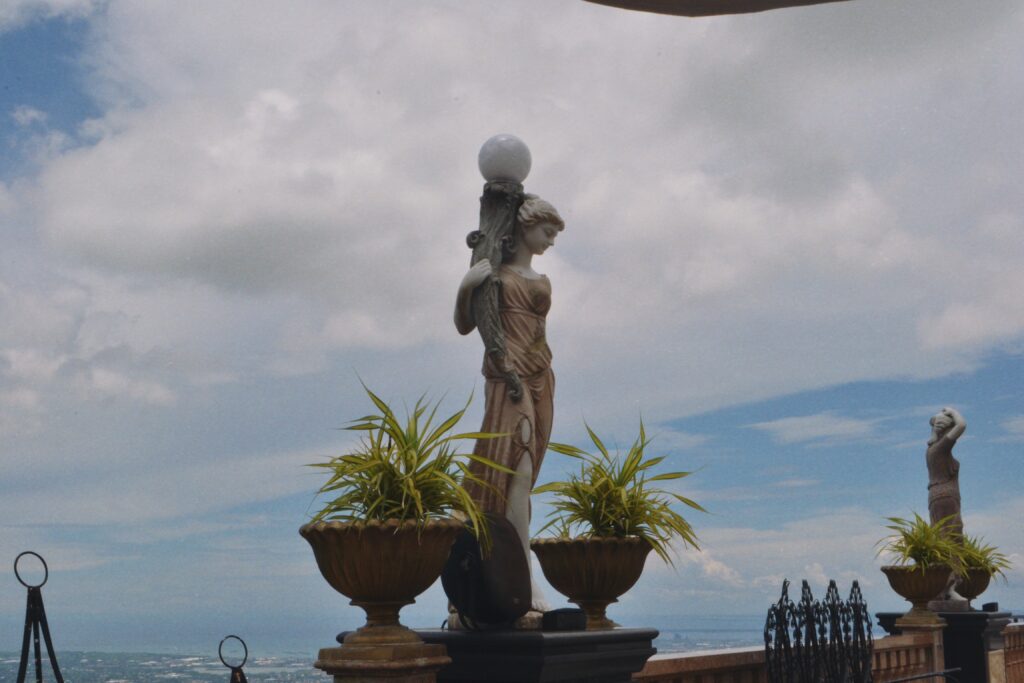
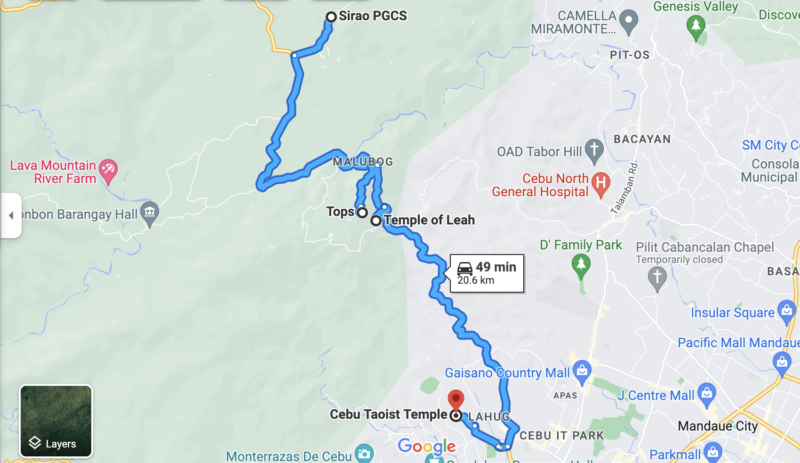
This day is dedicated to exploring the sights that are on the fringes of Cebu City. These sights are harder to get to which is why I recommend renting a motorbike or a car to get to these places as Grab cars might not be available that far out of the city and doing so is cheaper than going on a tour. If you would like to go on a tour though, you can find one here. This day has two possible itineraries: farthest to nearest or nearest to farthest in relation to Cebu City. These stops are ordered from farthest to nearest to Cebu City.
I did this on my last day, and would recommend you do so as well if you’re renting a motorbike or car, because it would lessen the amount of times you have to go back and forth to the Cebu airport, which if you’ve noticed is the most expensive transportation thing I paid for, flights, car rental, and tours aside. This means, however, that if you do rent a car, you’d have to get it after your excursion on Day 4, which can be a pain if you’re tired as renting a car entails going back to the airport to pick it up. Here were my expenses related to getting the car:
- Grab to Airport: Php 446 ($7.68)
- Alamo Car Rental: Php 2612.63 ($44.96)
You can do the following itinerary on your departure day if you book a flight for later that night. I think it took me about 6 hours to do everything. By booking an early morning arrival flight and a late-night departure flight, you save on having to pay extra nights at your accommodation!
Before the first stop, the only expense I incurred was breakfast at a restaurant called Maharlicup, which I highly recommend. It cost Php 185 ($3.18).
Here’s a map of the route for this particular day:
Stop 1: Sirao Flower Gardens
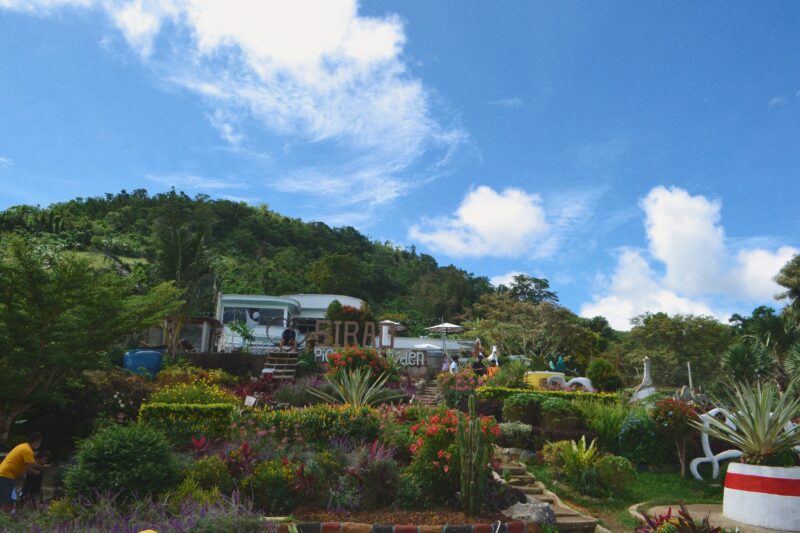
The one thing you have to know about visiting these gardens are that there are actually two of them: the Little Amsterdam Gardens and the PCGS garden. The PCGS garden costs Php 70 ($1.20) and the Little Amsterdam Garden costs Php 110 ($1.89). I personally think that the PCGS garden is the better of the two. It has really colorful flowers and is better maintained than the Little Amsterdam garden. Both gardens feature kitschy installations that you can take pictures in, with those at the PCGS garden being more photo-friendly than the ones in the Little Amsterdam garden. I had a great time exploring the gardens and the view from them was pretty great too. Note that parking costs Php 20 ($0.34). It will take you about 30-40 minutes to go through each garden.
Food / Drink Stop 1
After Sirao Flower Gardens I stopped at a coffee shop called Outback Servo and got a drink worth Php 179 ($3.08). Would highly recommend as it was super flavorful.
Stop 2: Tops Lookout
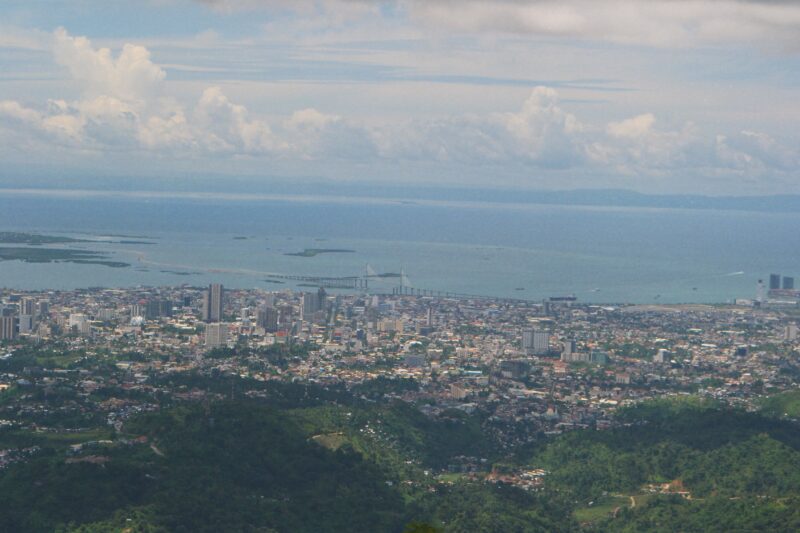
This overlook offers stunning views of Cebu City and neighboring Bohol (if the sky is clear enough). It costs Php 100 ($1.72) to enter but parking is free. I would recommend spending 15-20 minutes here to take in the view. Don’t forget to check out the bell that’s located towards the left side of the complex if you’re facing the view. You could also do a little picnic in one of the shaded tables if you want to stay here longer. I’m a sucker for a good view so I enjoyed this particular spot.
Stop 3: Temple of Leah
This temple is similar to the Taj Mahal in that it was built by a widower, in this case Teodorico Adarna, as a remembrance for his late wife. The temple is patterned after the Parthenon and includes two giant marble staircases, glittering chandeliers, and a huge gold statue of the matriarch herself. The grounds are nice too, with a marble fountain adorning the center and great views of the city, second only to Tops Lookout.
It costs Php 100 ($1.72) to enter and Php 50 ($0.86) to park your car. You will get a wristband and are then free to explore the grounds. You can’t go into any of the rooms but you can catch a glimpse of them if you walk down either of the exterior hallways. I spent 45 minutes here but I could have spent less time if I didn’t take so many pictures. This was the highlight of the day for me and it is not to be missed!
Food / Drink Stop 2
Before heading to the Taoist Temple I stopped at a restaurant called Balay sa Busay. I spent about Php 150 ($2.58) on really good Filipino food which, if you haven’t eaten at a Filipino restaurant at this point, I would highly recommend that you do. I then headed to the final stop of my tour.
Stop 4: Taoist Temple
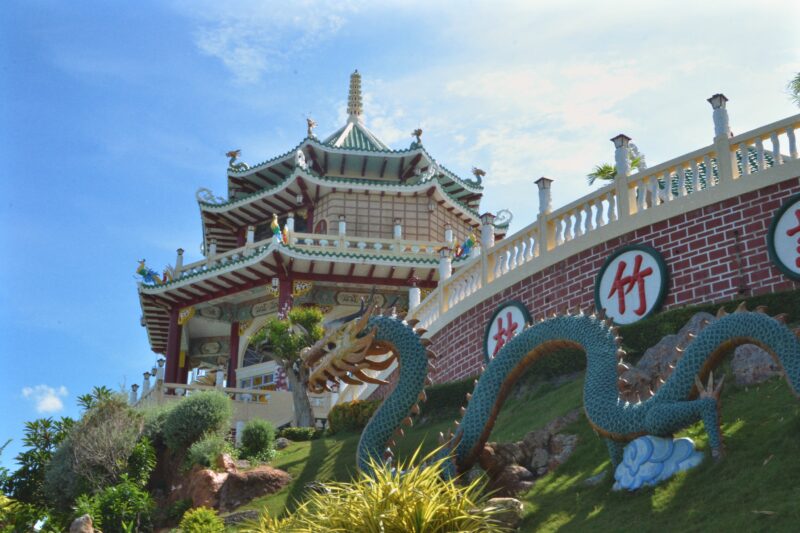
This multi-tiered temple is not the most elaborate Taoist temple in the world, but it does have a certain charm to it. It’s a free attraction and I spent about 25-30 minutes admiring the grounds. Dragons adorn numerous surfaces throughout the temple and, while you’re not allowed to take pictures of any of the altars (and they will have people stationed to make sure you don’t) it’s still interesting to look at and admire them. When you’re on the top floor, be on the lookout for a small koi pond, as well as a little water feature you can throw coins in.
Post-Itinerary Things
After the tour I returned to my hotel to pick up my bags that I left at my hotel. I then drove myself back to the car rental place near the airport, passing by a gas station on the way where I refilled my tank which cost Php 808.4 ($13.91). I was then shuttled to the airport where, upon reaching the check-in counters, was told that I could catch an earlier flight for free if I wanted to, which I did and then dropped my bags at check-in, went through security, and had dinner at a restaurant at the airport that cost Php 230 ($3.96). After that, I got on the plane and was back in Manila by 9pm.
And so ends the first itinerary! Now read on if you’ve decided you want to base yourself in Moalboal.
Go to the bottom of this post to see the budget breakdown of this itinerary.
IF YOU: Base Yourself in Moalboal (Cebu Itinerary 2)
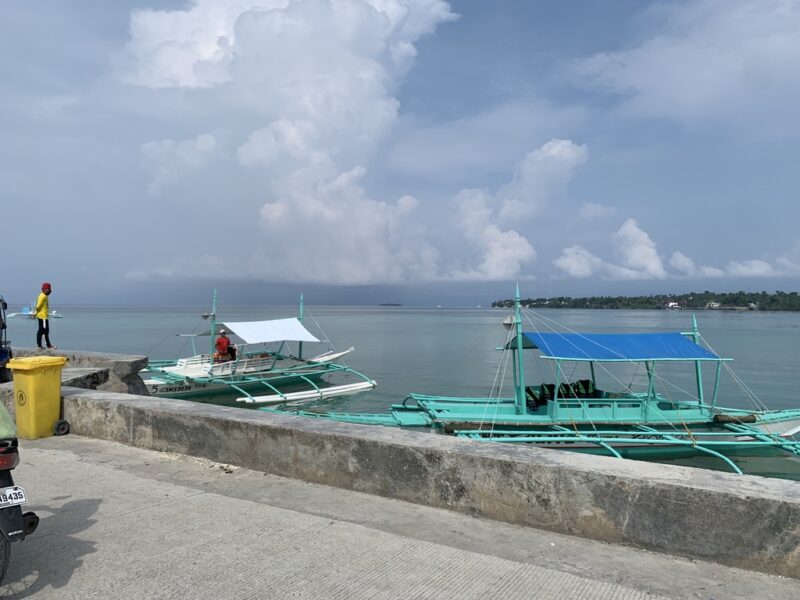
Now if you want to base yourself in Moalboal, which I recommend for a number of reasons that you can read about in the Travel Guide and the Budget Tips posts, you’re gonna essentially flip the first itinerary around. The excursions will be at the beginning of your trip and the Cebu City itineraries will be at the end. You will still be staying in Cebu City in this itinerary but for about 2-3 fewer nights, which will save you money as hotels in Cebu City are more expensive than those in Moalboal.
Take note though that if you do this itinerary you will need to rent a motorbike to reach all the excursions. You will also still need to rent a car to do the Cebu City outskirts itineraries and the Osmeña Peak / Simala Church route. You will also be sacrificing a day as designated travel days to travel between Cebu City and the South (unless you take an early morning flight for your arrival in Cebu so that you can also use that day to transit to Moalboal).
Here’s the recommended order of activities for this Cebu itinerary.
Day 0: Arrival Day (Try to make your flight in the early morning so you can catch the bus to Moalboal on this day as well).
Day 1: Island Hopping / Snorkeling
Day 2: Canyoneering
Day 3: Whale Shark Encounter
Day 4: Travel Back to Cebu City / Historic Cebu City Tour (Try to catch the earliest possible bus to Cebu City and then tour Historic Cebu in the afternoon. You will also be renting a car that night for the next two days)
Day 5: Osmeña Peak / Simala Church
Day 6: Cebu Outskirts Tour / Flight home (schedule your flight out of Cebu for late at night)
Now since you’re already in Moalboal, you won’t have to pay for a tour company to take you to the jump off points for each excursion as you can just go there yourself in your motorbike. Here are the costs for each of the three excursions now that you don’t have to pay for a tour:
- Canyoneering: Php 1500 ($25.82)
- Island Hopping: Php 2500 ($43.03)
- Whale Shark Swimming: Php 1000 ($17.21)
These prices do not include tips.
Sample Budget
Cebu Itinerary 1
| Cebu Itinerary 1 | Amount in Pesos | Amount in USD |
| Roundtrip Flights to Cebu | 5449.48 | 93.79 |
| Hotel in Cebu City (4 Nights) | 5823.12 | 100.49 |
| Arrival Day | ||
| Grab from Airport | 442 | 7.61 |
| Day 1 | ||
| Grab to Historic District | 141 | 2.41 |
| Fort San Pedro Entry Fee | 30 | 0.51 |
| 1730 Jesuit House Entry Fee | 50 | 0.85 |
| Yap-Sandiego House Entry Fee | 50 | 0.85 |
| Casa Gorordo Entry Fee | 75 | 1.28 |
| Grocery Store | 245 | 4.22 |
| Lunch at Dim sum Break | 85 | 1.45 |
| Grab to Hotel | 139 | 2.37 |
| Grab to Sunburst Chicken | 80 | 1.38 |
| Dinner at Sunburst Chicken | 114 | 1.95 |
| Grab to Hotel | 80 | 1.38 |
| DAY ONE TOTAL | 1089 | 18.65 |
| Day 2 | ||
| Island Hopping Tour | 8079.45 | 139.05 |
| Breakfast at Sula’s | 120 | 2.07 |
| Moalboal Tourism Fee | 100 | 1.72 |
| Tips to Boatmen | 500 | 8.6 |
| Lunch at Jollibee | 165 | 2.84 |
| Tip to Driver | 250 | 4.3 |
| Taxi to House of Lechon | 70 | 1.2 |
| Dinner at House of Lechon | 315 | 5.42 |
| Grab to Hotel | 130 | 2.24 |
| DAY TWO TOTAL | 9729.45 | 167.44 |
| Day 3 | ||
| Canyoneering Tour | 4291.03 | 73.85 |
| Tour Guide Tip | 300 | 5.16 |
| Driver Tip | 250 | 4.3 |
| Grab to Sugbo Mercado | 157 | 2.7 |
| Dinner at Sugbo Mercado | 90 | 1.55 |
| DAY THREE TOTAL | 5088.03 | 87.56 |
| Day 4 | ||
| Whale Shark Experience | 5210.83 | 89.68 |
| Fuel Charge for Tour | 1650 | 28.4 |
| Tips for Driver and Boatman | 500 | 8.61 |
| Lunch | 75 | 1.29 |
| Tumalog Falls Entry Fee | 120 | 2.07 |
| Grab to Dinner | 140 | 2.41 |
| Dinner | 150 | 2.58 |
| Grab from Dinner to Airport (to pickup car) | 446 | 7.68 |
| DAY FOUR TOTAL | 8291.83 | 142.72 |
| Day 5 | ||
| Car rental | 2612.63 | 44.96 |
| Osmeña Peak Tourism Fee | 30 | 0.52 |
| Guide for Hike | 200 | 3.44 |
| Lunch | 75 | 1.29 |
| Grab to Dinner | 140 | 2.41 |
| Dinner | 150 | 2.58 |
| Grab from Dinner | 140 | 2.41 |
| DAY FIVE TOTAL | 3347.63 | 57.61 |
| Day 6 | ||
| Car rental | 2612.63 | 44.96 |
| Breakfast at Maharlicup | 185 | 3.18 |
| Sirao Flower Gardens (Admission to Both Gardens and Parking) | 200 | 3.44 |
| Drink at Outback Servo | 179 | 3.08 |
| Tops Lookout | 100 | 1.72 |
| Temple of Leah Entry Fee and Parking | 150 | 2.58 |
| Lunch | 150 | 2.58 |
| Gas Stop | 808.4 | 13.91 |
| Airport Dinner | 230 | 3.96 |
| DAY SIX TOTAL | 4615.03 | 79.41 |
| TOTAL FOR ITINERARY 1 | 43875.57 | 755.28 |
Cebu Itinerary 2
| Cebu Itinerary 2 | Amount in Pesos | Amount in USD |
| Roundtrip Flights to Cebu | 5449.48 | 93.79 |
| Hotel in Moalboal (4 nights) | 5113.21 | 88 |
| Hotel in Cebu City (2 Nights) | 2911.56 | 50.25 |
| Arrival Day | ||
| Grab from Airport to Cebu South Bus Terminal | 442 | 7.61 |
| Bus to Moalboal | 170 | 2.93 |
| Food Budget | 400 | 6.88 |
| ARRIVAL DAY TOTAL | 1012 | 17.42 |
| Day 1 | ||
| Motorbike Rental | 500 | 8.6 |
| Moalboal Boat Rental | 2500 | 43.03 |
| Moalboal Tourism Fee | 100 | 1.72 |
| Tips to Boatmen | 500 | 8.6 |
| Food Budget | 400 | 6.88 |
| DAY ONE TOTAL | 4000 | 68.83 |
| Day 2 | ||
| Motorbike Rental | 500 | 8.6 |
| Canyoneering | 1500 | 25.82 |
| Tour Guide Tip | 300 | 5.16 |
| Food Budget | 400 | 6.88 |
| DAY TWO TOTAL | 2700 | 46.46 |
| Day 3 | ||
| Motorbike Rental | 500 | 8.6 |
| Whale Shark Swimming | 1000 | 17.21 |
| Tips for Driver and Boatman | 250 | 4.3 |
| Food Budget | 400 | 6.88 |
| DAY THREE TOTAL | 2150 | 36.99 |
| Day 4 | ||
| Bus back to Cebu City | 170 | 2.93 |
| Grab to Hotel | 140 | 2.41 |
| Grab to Historic District | 141 | 2.41 |
| Fort San Pedro Entry Fee | 30 | 0.51 |
| 1730 Jesuit House Entry Fee | 50 | 0.85 |
| Yap-Sandiego House Entry Fee | 50 | 0.85 |
| Casa Gorordo Entry Fee | 75 | 1.28 |
| Grab to Hotel | 140 | 2.41 |
| Food Budget | 400 | 6.88 |
| Grab to Airport (to pickup car) | 446 | 7.68 |
| DAY FOUR TOTAL | 1642 | 28.21 |
| Day 5 | ||
| Car rental | 2612.63 | 44.96 |
| Osmeña Peak Tourism Fee | 30 | 0.52 |
| Guide for Hike | 200 | 3.44 |
| Lunch | 75 | 1.29 |
| Grab to Dinner | 140 | 2.41 |
| Dinner | 150 | 2.58 |
| Grab from Dinner | 140 | 2.41 |
| DAY FIVE TOTAL | 3347.63 | 57.61 |
| Day 6 | ||
| Car rental | 2612.63 | 44.96 |
| Sirao Flower Gardens (Admission to Both Gardens and Parking | 200 | 3.44 |
| Tops Lookout | 100 | 1.72 |
| Temple of Leah Entry Fee and Parking | 150 | 2.58 |
| Lunch | 150 | 2.58 |
| Gas Stop | 808.4 | 13.91 |
| Airport Dinner | 230 | 3.96 |
| DAY SIX TOTAL | 4251.03 | 73.15 |
| TOTAL FOR ITINERARY 2 | 32576.91 | 560.71 |
And that’s it! The only thing left to do is to have a good trip! If you do go to Cebu, come tell me all about it by emailing me at contact@passportperspective.com or send me a DM on instagram @StephenFloresTravel!
If you found this 6-day Cebu itinerary helpful, consider subscribing to my newsletter to receive inspiration, tips, and insider secrets delivered straight to your inbox. Whether you’re planning your next adventure, daydreaming about far-off places, or seeking hidden gems closer to home, we’ve got you covered.
✨ Here’s What You’ll Get:
- Curated travel guides to iconic and off-the-beaten-path destinations.
- Budget-friendly tips and tips on solo traveling.
- Exclusive deals and must-know travel advice.
- Stories and trip reports to spark your wanderlust and make your trips unforgettable.
Travel smarter, deeper, and with more joy. Join our community of explorers today and never miss a chance to wander! Sign up down below!


Leave A Comment